
Overview #
Add the domain to MXroute #
For this example I am using the new MXroute (aka DirectAdmin) service type, not the CPanel service type.
- Navigate to the MXroute Dashboard
- Select the service
- Select Login Details
- Go to the URL and Log in
- Account Manager -> Domain Setup -> Add new -> Enter Details -> Get prompted for verification
Script output: domain_create_pre.sh
Error: Domain verification failed!

To add example.com to your account, you must first prove ownership by adding a DNS TXT record:

Record Type: TXT
Record Name: _da-verify-12345
Record Value: domain-verified

Please add this record to your domain's DNS settings and wait for DNS propagation (usually 5-15 minutes).

After adding the record, you can verify it's working by running:
dig TXT _da-verify-12345.example.com

Once the record is in place, try adding the domain again.
Verify Domain Ownership using Cloudflare DNS Records #
- Head on over to the Cloudflare Dashboard
- Account Home -> Domains -> Click on the target domain
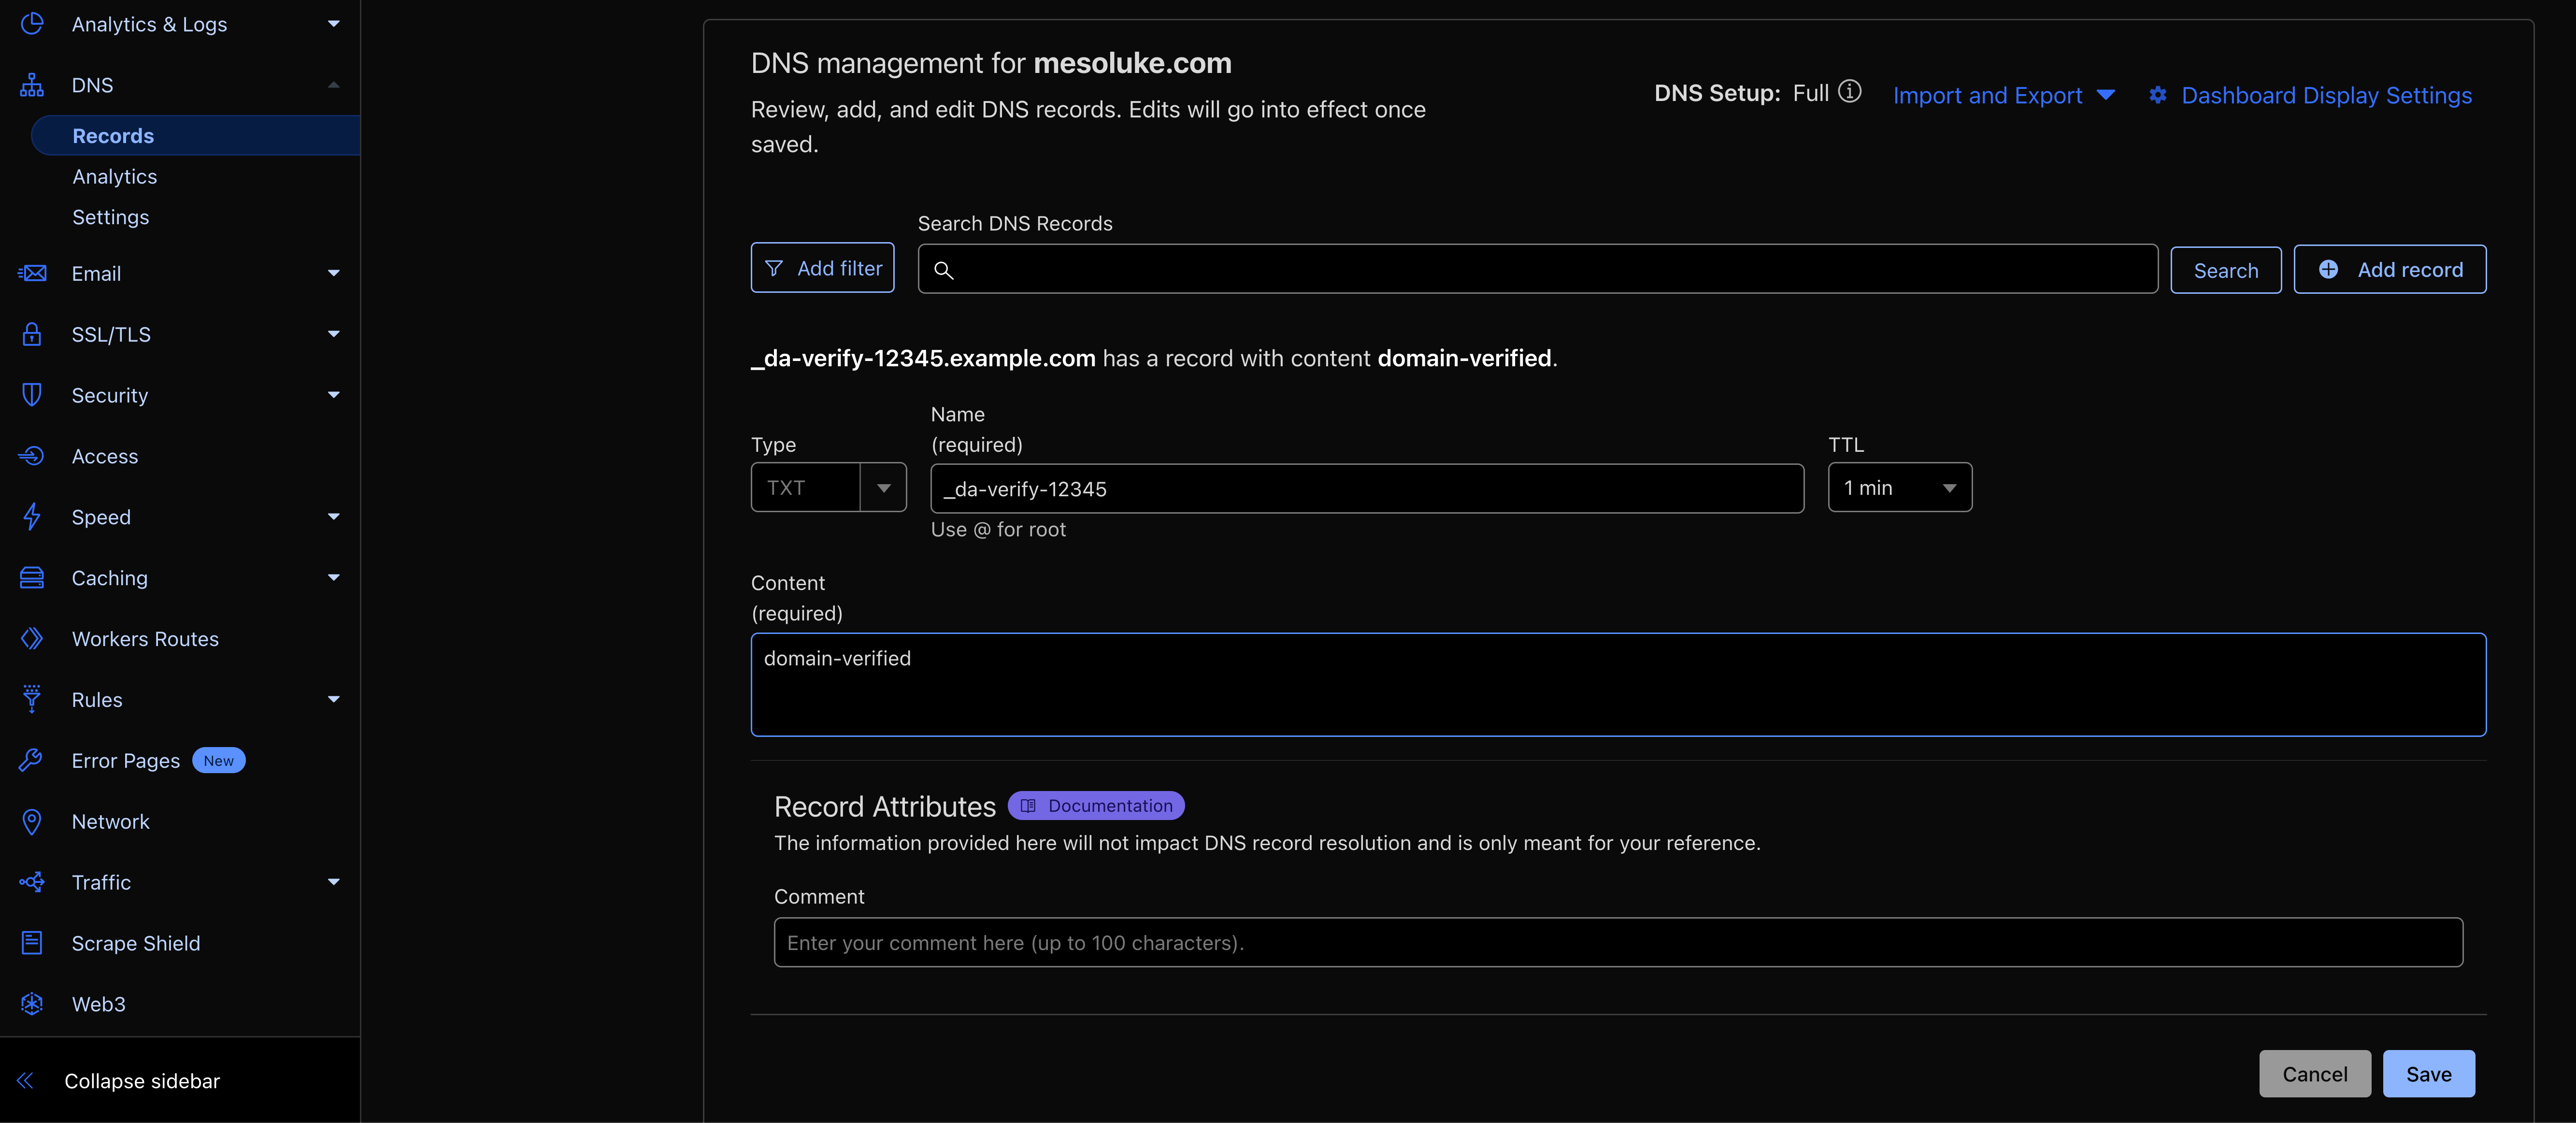
- DNS -> Records -> Add record
- Enter the info by creating a TXT record with the supplied name and value
- Save it
Back to MXroute #
- Add the domain again
- If the record has propagated (hopefully you set TTL to 1 minute), you should see something like this
Added record ns1.DoNotUseThisItDoesNotWork.tld.example.com. A z.z.z.z to satisfy example.com. NS ns1.DoNotUseThisItDoesNotWork.tld Please check the zone for example.com to ensure the nameserver A records are correct. User added to named.conf file successfully Domain Created Successfully - Account Manager -> DNS Records -> Grab the supplied DKIM and SPF records and create them in Cloudflare for the target domain
Create an eMail Account #
You will notice that a default email is automatically created. That’s fine, but we want to make our own.
- E-mail Manager -> E-mail Ccounts -> Create Account
- Fill in the details and create account
- Capture the POP/IMAP and SMTP Server settings for eMail clients
- From the Webmail Navbar Item, copy the link for the preferred webmail client. I like Crossbox, personally.
Add MX Records #
The MX records you need will be in your welcome email. So don’t delete that! Put all that info in your password manager!
You may also be able to find it from the MXroute Dashboard by going to History -> Emails, then looking for “Important Account Information” emails.
See the MXroute Quick Setup Guide for additional details.
For Example
example.mxlogin.com (Priority 10)
example-relay.mxlogin.com (Priority 20)
OR
example.mxrouting.net (Priority 10)
example-relay.mxrouting.net (Priority 20)
Enable DMARC Management in Cloudflare #
- Account Home -> Domains -> Click on the target domain
- Email -> DMARC Management -> Enable DMARC Management -> Add
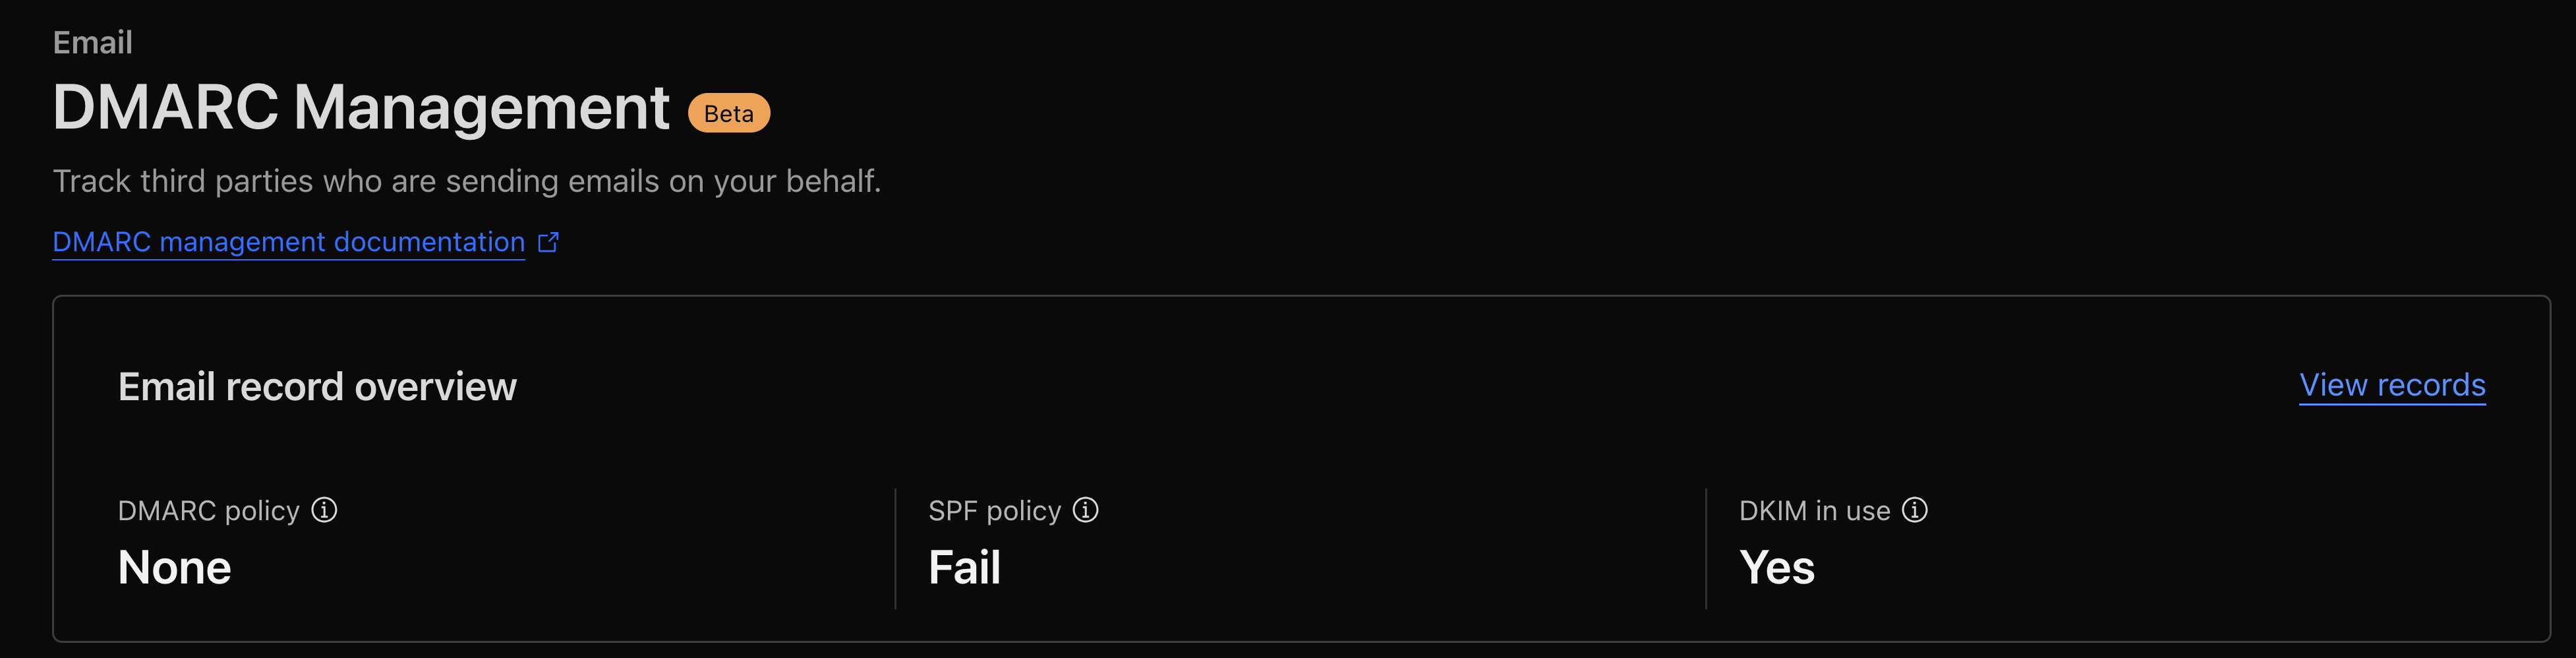
You should see something like the following if set up correctly. Do not be alarmed by the output.
DMARC Policy = None indicates that DMARC is enabled, but is in a monitoring state only SPC Policy = Fail indicates that SPF is enabled, and it will reject all emails that fail SPF DKIM in use = Yes indicates DKIM is enabled, and our outgoing emails will be verified
Nice work!
Send yourself a test email #
Send an email from another account to this new one to ensure everything works!
Set up a custom webmail hostname #
Follow the instructions at MXroute Setting Up Custom Hostnames .
- In Cloudflare, leave the Cloudflare “Proxy” option enabled.
- Once complete
- Use
https://webmail.yourdomain.comto access webmail - Incoming Mail Server (IMAP):
mail.yourdomain.com - Outgoing Mail Server (SMTP):
mail.yourdomain.com
- Use
Important Ports #
| Protocol | SSL | Non-SSL/STARTTLS |
|---|---|---|
| IMAP | 993 | 143 |
| POP3 | 995 | 110 |
| SMTP | 465 | 25, 587, 2525 |
TTL Notes #
When I do an initial setup I usually set my TTLs down to 1 minute so I don’t have to wait around, but after everything is all set up, I go back and set them to Auto in order to respect resources.
Troubleshooting #
The page isn’t redirecting properly #
If you’re receiving ERR_TOO_MANY_REDIRECTS , it’s likely because the wrong Encryption mode is selected.
I chose Full (Strict) .